
Angle guide sharpening ensures consistent blade edges, vital for performance and safety. It’s a technique utilizing tools to maintain precise sharpening angles,
benefitting both novice and experienced users.
Queries reveal sharpening involves understanding blade geometry and selecting appropriate stones, while consistent angles yield superior results.
What is Angle Guide Sharpening?
Angle guide sharpening is a method of restoring a blade’s edge by maintaining a consistent angle throughout the sharpening process. Unlike freehand sharpening, it employs a physical guide – an attachment or dedicated tool – to dictate and enforce the correct angle.
This technique is crucial because a precise angle is paramount for optimal cutting performance and edge retention. Queries demonstrate that it’s about achieving repeatable results, eliminating guesswork, and ensuring a uniformly sharp blade, whether it’s a pocket knife or a chisel.
Why Use an Angle Guide?
Angle guides offer significant advantages over freehand sharpening. They guarantee consistent angles, crucial for achieving a sharp, durable edge. Queries highlight that maintaining a precise angle is challenging without assistance, especially for beginners.
Using a guide minimizes errors, prevents rounding of the blade’s shoulder, and ultimately saves time and effort. It’s particularly beneficial for those seeking repeatable results and a professional-quality finish, ensuring optimal performance from their cutting tools.
Types of Angle Guides
Angle guides come in various forms: fixed, adjustable, and magnetic. Each type caters to different sharpening needs and preferences, offering varying levels of precision and versatility.
Fixed Angle Guides
Fixed angle guides offer simplicity and consistency, ideal for beginners. These guides typically clamp onto the blade, establishing a single, predetermined sharpening angle. They are excellent for tools requiring a specific, unchanging edge geometry, like certain woodworking chisels.
While limiting versatility, their ease of use minimizes errors and promotes rapid, repeatable results. They are often more affordable than adjustable options, making them a practical entry point into guided sharpening.
Adjustable Angle Guides
Adjustable angle guides provide versatility, accommodating various blade types and sharpening needs. These guides allow users to select and lock in a desired angle, crucial for knives and tools with differing edge requirements. They offer greater control compared to fixed guides, enabling customization for convex grinds or specific bevels.
Though requiring a slight learning curve, adjustable guides ultimately deliver precision and adaptability, making them a valuable asset for serious sharpening enthusiasts.
Magnetic Angle Guides
Magnetic angle guides utilize powerful magnets to securely attach to the blade during sharpening, offering a hands-free experience. This design ensures consistent angle maintenance, minimizing user fatigue and maximizing precision. They are particularly useful for larger blades or when prolonged sharpening sessions are required.
However, compatibility with blade steel is crucial; some steels may not hold the magnetic connection as effectively. These guides offer convenience and stability for many sharpening tasks.
Essential Tools for Angle Guide Sharpening
Sharpening success demands quality stones, a honing steel for refinement, and, of course, a reliable angle guide attachment for consistent, precise blade edges.
Sharpening Stones (Water Stones, Oil Stones, Diamond Stones)
Selecting the right stone is crucial for effective angle guide sharpening. Water stones offer fast material removal and a fine polish, requiring water lubrication. Oil stones, conversely, utilize oil, providing slower but controlled sharpening.
Diamond stones excel in speed and longevity, working effectively with or without liquid. Grit levels determine the aggressiveness of the sharpening process; coarser grits establish the bevel, while finer grits refine the edge. Choosing the appropriate stone depends on the blade material and desired sharpness.
Honing Steel
A honing steel, though not for sharpening, is vital post-angle guide work. It realigns the blade’s microscopic edge, restoring sharpness lost during use. Unlike sharpening stones, it removes minimal material, maintaining the established bevel.
Using a honing steel regularly – even after each use – prolongs the time between full sharpenings. Proper technique involves a consistent angle and light pressure, drawing the blade across the steel. It’s a crucial step for maintaining a refined, working edge.
Angle Guide Attachment
An angle guide attachment clamps onto your sharpening stone or honing guide, providing a physical reference for consistent blade angles. These attachments are crucial for beginners, eliminating guesswork and ensuring repeatable results. They often feature adjustable settings for various blade types and desired sharpness levels.
Quality attachments offer stability and precise angle control, significantly improving sharpening accuracy. Selecting a compatible attachment for your sharpening system is key to maximizing its effectiveness and achieving professional-grade results.
Preparing for Sharpening
Proper preparation involves selecting the correct angle, securely clamping the blade, and choosing appropriate lubrication – oil or water – for optimal sharpening results.
Choosing the Right Angle
Selecting the correct sharpening angle is crucial for blade performance and longevity. Different blade types require different angles; pocket knives often benefit from a 20-degree angle,
chisels around 25-30 degrees, and plane irons typically at 30-40 degrees.
A steeper angle provides durability but can reduce sharpness, while a shallower angle offers a keener edge but is more prone to chipping.
Consulting blade specifications or researching recommended angles for your specific tool is highly advisable before beginning the sharpening process.
Securing the Blade
Properly securing the blade is paramount for safety and consistent sharpening. Utilize a vise, clamps, or a dedicated blade holder to firmly stabilize the blade during the process.
Ensure the blade doesn’t wobble or shift, as this compromises angle control and can lead to uneven sharpening or injury.
A stable setup allows for controlled, consistent strokes, maximizing the effectiveness of the angle guide and sharpening stones. Prioritize a secure grip before initiating any sharpening action.
Lubrication (Oil vs. Water)
Lubrication is crucial during angle guide sharpening, preventing friction and heat buildup. Oil stones traditionally use honing oil, while water stones require water.
The choice impacts the sharpening process and stone lifespan; Water creates a slurry aiding abrasive cutting, while oil provides longer-lasting lubrication.
Always follow the stone manufacturer’s recommendations. Using the incorrect lubricant can damage the stone and diminish sharpening effectiveness. Consistent lubrication ensures a smooth, clean cut.

The Sharpening Process with an Angle Guide
Utilizing an angle guide involves establishing the correct angle, applying consistent pressure, and making controlled strokes across the sharpening stone for optimal results.
Queries emphasize maintaining a steady hand and checking for a burr to confirm sharpening progress.
Establishing the Initial Angle
Precisely setting the initial angle is paramount for effective sharpening. An angle guide clamps onto the blade, dictating the consistent angle throughout the process. Begin by selecting the appropriate angle based on the blade type – steeper angles for heavier tasks, shallower for finer work.
Queries highlight the importance of securely attaching the guide and ensuring it aligns perfectly with the blade’s edge. Double-check the angle before applying pressure to the stone, as adjustments mid-stroke can compromise accuracy.
Consistent Strokes
Maintaining consistent strokes is crucial when using an angle guide. Apply moderate, even pressure while drawing the blade across the sharpening stone, following the guide’s established angle. Avoid varying speed or pressure, as this leads to uneven sharpening.
Queries emphasize full blade contact with the stone during each pass. Overlap each stroke slightly to ensure complete coverage and a uniform edge. Focus on smooth, controlled movements for optimal results.
Checking for a Burr
Detecting a burr indicates successful sharpening with an angle guide. A burr is a tiny, raised edge formed on the opposite side of the blade from where you’re sharpening. Feel for it gently with your thumb – carefully!
Queries suggest alternating sides with each set of strokes. The presence of a burr confirms metal removal and angle establishment. Continue sharpening until a consistent burr runs the entire blade length.
Deburring and Finishing
Deburring removes the raised edge created during sharpening, while finishing refines the blade. Stropping enhances sharpness and polishes the edge for optimal cutting performance.
Removing the Burr
The burr, a microscopic wire edge, forms during sharpening and must be eliminated for a truly sharp blade. Gentle strokes on progressively finer stones, alternating sides, effectively reduce it.
Light pressure is key; avoid digging into the steel. Honing steels, used at a slightly higher angle, can also carefully remove the burr. Inspect frequently to confirm its disappearance, ensuring a clean, refined edge ready for stropping and optimal performance.
Stropping for a Razor Edge
Stropping refines the edge beyond sharpening, aligning microscopic steel fibers for unparalleled sharpness. Using a leather strop loaded with polishing compound, draw the blade away from the edge, maintaining a low angle.
Multiple passes, with decreasing pressure, polish the edge to a mirror finish. This process isn’t sharpening, but rather honing the existing edge, creating a truly razor-sharp result. Regular stropping extends sharpness between full sharpening sessions.

Sharpening Different Blade Types
Blade geometry varies; pocket knives need acute angles, chisels benefit from steeper ones, and plane irons require a balance.
Angle guides adapt to these differences, ensuring optimal sharpness for each tool.
Pocket Knives
Pocket knife sharpening demands precision due to their versatile use and often smaller blade sizes. An angle guide is invaluable for maintaining a consistent, acute edge – typically between 15 and 20 degrees – crucial for slicing tasks.
Employing light pressure and consistent strokes with a diamond stone, guided by the tool, prevents over-sharpening and preserves the blade’s profile. Remember to address both sides equally for a balanced, functional edge. Queries emphasize the importance of a sharp pocket knife for safety and utility.
Chisels
Chisel sharpening benefits significantly from angle guides, as maintaining a precise bevel is critical for woodworking accuracy. A typical angle ranges from 25 to 30 degrees, depending on the chisel’s intended use – higher angles for harder woods.
Using water stones with an angle guide ensures a flat, even surface. Consistent strokes and checking for a burr are essential. Queries highlight that a well-sharpened chisel dramatically improves joinery and overall woodworking quality, reducing splitting and tear-out.
Plane Irons
Plane iron sharpening demands precision; angle guides are invaluable for achieving this. A common primary bevel angle is 30 degrees, often followed by a secondary bevel of 35-40 degrees for enhanced sharpness and durability.
Employing diamond stones with an angle guide delivers a polished edge. Consistent pressure and stroke length are key. Queries emphasize that a properly sharpened plane iron results in smoother, cleaner shavings, improving the quality of woodworking projects.

Maintaining Your Sharpened Edge
Regular honing preserves sharpness between full sharpenings. Proper storage, protecting the blade from impacts and corrosion, extends the life of your carefully honed edge.
Regular Honing
Consistent honing is crucial for maintaining the refined edge achieved through angle guide sharpening. Unlike sharpening, which removes metal, honing realigns the blade’s microscopic teeth.
Employing a honing steel or ceramic rod several times before each use keeps the edge performing optimally. This simple practice minimizes the frequency of full sharpening, prolonging the blade’s lifespan and ensuring consistent cutting performance. Queries emphasize that regular honing is a preventative measure, not a restorative one.
Proper Storage
Safeguarding your freshly sharpened blade through proper storage is paramount. Avoid simply tossing tools into drawers where edges can dull from contact with other items. Utilize blade guards, sheaths, or magnetic strips to protect the cutting surface.
Storing blades separately prevents accidental damage and maintains the precision achieved with angle guide sharpening. Queries suggest humidity control is also beneficial, preventing rust and corrosion, ultimately extending the blade’s life and performance.
Troubleshooting Common Issues
Common challenges include maintaining a consistent angle or achieving even sharpening. Addressing these requires practice, checking for burrs, and adjusting technique for optimal results.
Difficulty Maintaining Angle
Struggling with consistent angles is frequent, especially for beginners. Ensure the guide is firmly secured to the blade and apply even pressure throughout each stroke.
Slow, deliberate movements are key; avoid rushing. Regularly check the angle against the guide during sharpening. If issues persist, consider a different guide type or practice on less valuable blades to build muscle memory. Queries suggest focusing on consistent hand position.
Uneven Sharpening
Uneven sharpening often stems from inconsistent pressure or stroke distribution along the blade’s length. Ensure you’re sharpening the entire edge, not just the center. Rotate the blade slightly with each pass, covering the full width.
Check frequently for a uniform burr along the entire edge. Queries indicate that varying grit stones can help correct minor unevenness, but prevention through technique is crucial.

Advanced Techniques
Mastering angle guide sharpening involves utilizing varied grit stones and exploring convex grinds for enhanced edge retention and performance. Precision is key!
Using Different Grit Stones
Employing a progression of grit stones is crucial for refined sharpening. Start with coarser grits to rapidly remove material and establish the bevel, then transition to medium grits for refining the edge.
Finally, utilize finer grits to polish and achieve a razor-sharp finish. This systematic approach, guided by the angle guide, ensures consistent results. Different stones—water, oil, or diamond—offer unique characteristics impacting speed and finish.
Creating a Convex Grind
A convex grind, stronger than a flat grind, is achieved by subtly rounding the edge during sharpening. While angle guides primarily assist with flat grinds, skilled users can manipulate the blade and guide to introduce a slight curve.
This involves easing off pressure towards the edge, creating a gradual transition. Convex grinds excel in chopping tasks, offering durability. Mastering this technique requires practice and a feel for the steel.

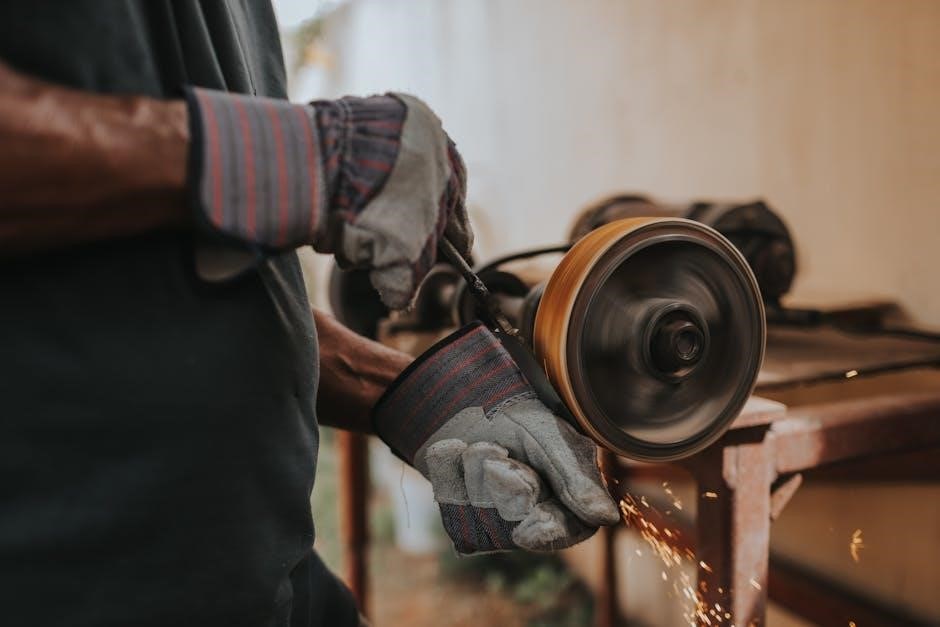
Safety Precautions
Prioritize hand protection with cut-resistant gloves during sharpening. Securely handle tools, maintaining focus, and avoid rushing. A stable workspace is crucial for safe, effective results.
Protecting Your Hands
Sharpening blades presents inherent risks, making hand protection paramount. Invest in high-quality, cut-resistant gloves specifically designed for knife or tool sharpening. These gloves create a barrier against accidental slips, significantly reducing the chance of severe cuts.
Even with an angle guide, maintaining control is vital. Gloves enhance grip and provide a tactile feel, improving precision. Remember, a moment of inattention can lead to injury, so prioritize safety with appropriate handwear during every sharpening session.
Proper Tool Handling
Safe angle guide sharpening demands respect for your tools. Always maintain a firm, controlled grip on both the guide and the blade. Avoid excessive force during strokes; let the stone and guide do the work. Inspect tools before each use for damage – cracks, loose parts, or dull stones.
Store sharpening equipment securely when not in use, preventing accidental contact. A well-maintained and thoughtfully handled toolkit minimizes risks and maximizes sharpening efficiency, ensuring a safer and more effective process.

Resources and Further Learning
Expand your sharpening skills through online tutorials and dedicated classes. These resources offer detailed guidance, refining technique and unlocking advanced angle guide sharpening methods.
Online Tutorials
Numerous online platforms host comprehensive angle guide sharpening tutorials, catering to diverse learning styles. YouTube channels frequently demonstrate techniques, offering visual guidance for beginners and advanced users alike. Websites dedicated to knife making and woodworking often include detailed articles and video demonstrations.
These resources cover everything from selecting the right angle guide to mastering consistent strokes and troubleshooting common issues. Searching for “angle guide sharpening tutorial” yields a wealth of information, enabling self-paced learning and skill development.
Sharpening Classes
Hands-on sharpening classes provide invaluable personalized instruction for mastering angle guide techniques. Local knife shops, woodworking schools, and culinary centers frequently offer courses led by experienced instructors. These classes allow for direct feedback and correction of technique, accelerating the learning process.
Participants gain practical experience with various angle guides and sharpening stones, learning to adapt to different blade types. Such classes foster a deeper understanding of sharpening principles beyond online resources.